paintless dent repair tutorial - Auto Reconditioning - Paintless Dent Removal - Bumper Scratch Repair | Auto Reconditioning – Paintless Dent Removal – Bumper Scratch Repair

Posts Tagged ‘paintless dent repair tutorial’

Paintless Dent Repair Training / Body Line BMW M3

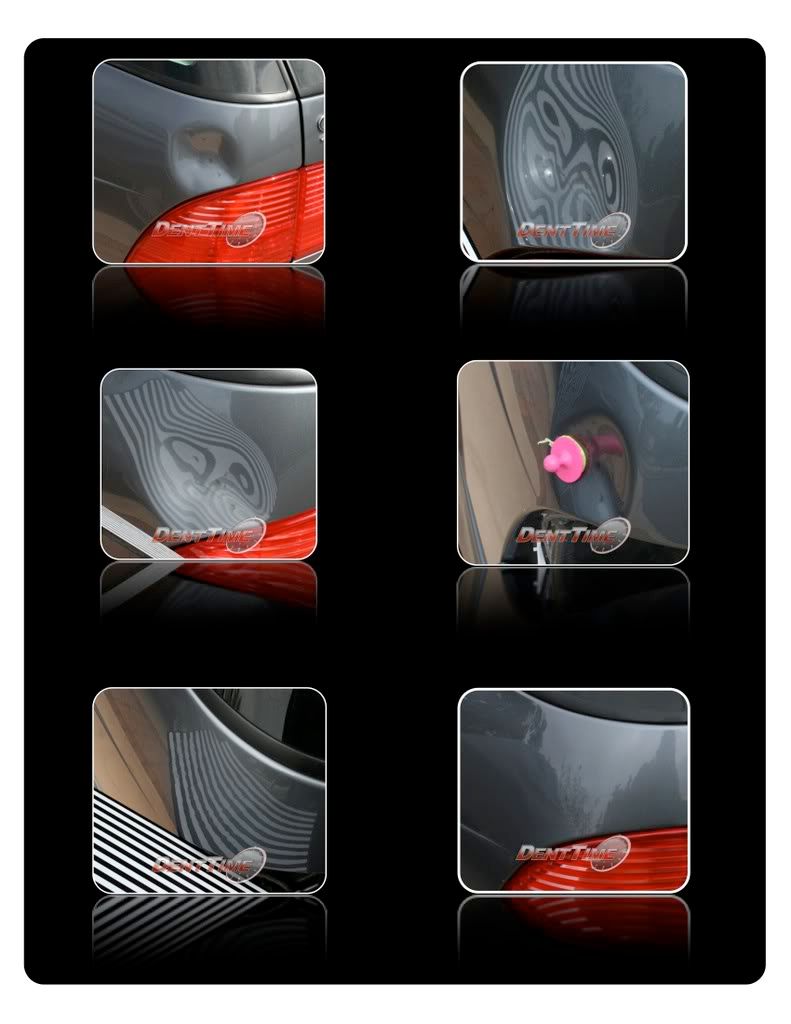
My name is Myke Toledo and I would like to share my body line paintless dent repair I performed on a BMW M3. The dent took over 2 hours to do. If you are looking into pdr training, then you should consider really understand that paintless dent removal is not nearly as easy as it appears.

But back to the subject. A body line dent requires advanced training and understanding how the metal reacts when pushed a certain way with a certain tool. Mainly it is the paint finish you have to worry about. Unlocking the metal helps the paint finish to become more flexible. I used heat in the video as you can see and it helped tremendous. Without using heat, this dent repair would not have been successful. In the early days, a dent like this would not have been even considered for pdr. But today, I have the experience, the latest tools and most of all patience.

No matter how long or your experience, if you don’t understand how to be patient or manage your time, you will rush and not get the best result possible. Anyways, I hope you liked the light pdr dent repair tutorial.

New PDR Body Line Training Tutorial – Paintless Dent Removal

We are about to release the new download regarding another body line PDR tutorial. Since the M35 tech article tutorial, we have had many requests to do another. So by demenad, we did. As before, we explain the different ways and techniques how it’s completed step by step.

Paintless Dent Repair has come a long way and so has the advanced ways on how to inform, train and advise new PDR techs how to practice good habits. As mentioned previously from other posts, it’s always best to obtain good personal one-on-one PDR training but in most cases, it can be hard to afford and take the time off to train.

Please understand, we try our best to put together an informative and well designed tech articles. In many cases, we can not always demonstrate every technique in every article. That is why we try to publish multiple articles of the same type of dents so we can cover differnt perspectives.

Look out for the new Body Line PDR tutorial to hit the market on April 1st!

Dent Time Gives Paintless Dent Repair / Removal Tutorial

Line Board PDR – Paintless Dent Repair Tutorial- 9-3 Saab


Dent Time expalines and shows a little bit on how they removed a fairly deep baseball dent on the corner of the rear quarter panel. The repair took about 3 hours. As most know, dealing with corner dents there is always a lot of tension around the edges. Pushing the dent from behind first did not work. Nor did it help by knocking down as well. 


Starting the Dent

It was only obvious that glue pulling was going to play a factor when it came to removing the dent. Pushing from behind would only force it and cause unwanted push marks and jeopardizing the integrity of the finish. About three pulls later, the dent was only a quarter way removed but there was a price to pay. The clear coat was hair-lining. If the dent was pulled any further, it would have pulled the paint right off. The hair-line fractures were barely noticeable and the repair continued. 


Crown Releasing

Knocking down the crowns was much easier since now the pressure was taken off. We never really try to do too much at once. Always keeping our dents balanced is one of our key techniques for a successful dent removal. We use a semi sharp knockdown and carefully work the outside. Unfortunately sometimes and knockdown can cause unwanted tap down pits. Although it can be fixed, it just takes more time in the end to finish. We show this on our video tutorial later. 


Pushing the Dent

Finally we were able to use a soft tip tool and work from the outside of the dent towards the middle. Now we had to go back n forth between pushing and knocking down. Lastly, we used a sharper tool to pin point all the mistaps caused by the sharp crowns. Indeed it was tedious but it had to be done. 3 hours later it was completed. Video coming soon..


Under Construction

PhotobucketOur blog is under construction. We are working hard to bring a better navigation experience. Thank you for your patience.